This tutorial isn't just about installing WordPress. It will cover how to set up a database using cPanel and, optionally, how to unzip files directly on your web server.
WordPress also has installation documentation, but I'm going to show you how I like to do it.
The Easy Way
- Estimated time: 15 minutes
- Skill level required: Beginner
Requirements
- Access to a web server with FTP and cPanel
- An FTP client
Steps
Download WordPress.
Go to wordpress.org/download and click Download WordPress. Save the ZIP file somewhere on your computer. The desktop works well because you can delete it in a minute.
Unzip it.
Find the file on your computer, right-click it, and select Extract Here. If you don't have an option like that, you may need a file archiver. I like WinRAR, but 7-Zip is free.
This will create a folder named
wordpresson your desktop.Upload it.
Open your FTP client. FileZilla is free if you need one. Connect to your web server using your server address, usually your domain, username, and password.
After connecting, upload all the files inside the
wordpressfolder. Don't upload the folder itself unless you want WordPress to be located atyoursite.com/wordpress.You probably want to put the files inside the
wwworpublic_htmlfolder on your web server. If there are already files there, they may conflict with WordPress. Consider deleting them or moving them to a subfolder.Note: I'm not responsible if your web server explodes or anything else bad happens.
Create a configuration file.
Go to
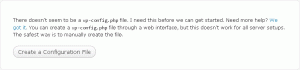
yoursite.com. You should be presented with a screen that looks something like this, from WordPress 2.7:Ignore the warning and click the large Create a Configuration File button. It should work for most setups. If it doesn't, you'd better follow their instructions, not mine.
Continue to the next page.
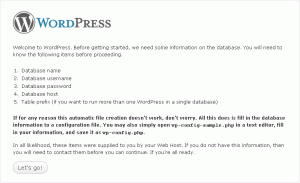
Ignore the pretty text and click Let's go!
Set up the database.
WordPress will ask you for a bunch of information. If you don't know what to enter, here's how to set it up when your web host uses cPanel.
Open
yoursite.com/cpanelin a new tab or window. If you get a 404 or something similar, talk to someone else. :)Enter your username and password if prompted. Depending on your version of cPanel, you should see a collection of icons. Find MySQL Databases and click it.
We're going to create a new database for WordPress so that we don't accidentally muck anything else up. Near the top of the page, there should be an area labeled Create a New Database. Enter something clever like
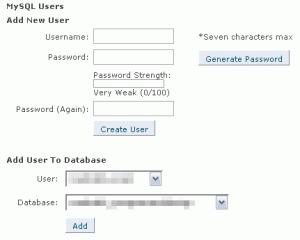
wordpressormysite, then create the database.Scroll down to Add New User. Choose a username and password, then create the user. You might as well make the password a random combination of uppercase and lowercase letters, numbers, and symbols. You should only need to enter it once after it has been created.
Next, scroll to Add User to Database. Select the username and database you just created, then click Add.
If cPanel added another username before the database name or username, make note of the complete names. You will need to enter them into the WordPress installation form.
Fill in the WordPress form.
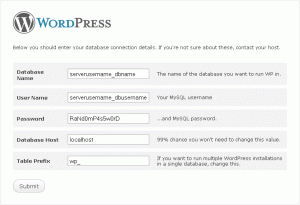
Your database is now set up. Return to the WordPress form and enter the database name, username, and password you created. Include any prefixes added by cPanel.
You shouldn't need to change the database host or table prefix. Click Submit.
Finish the installation.
You're done. You can listen to WordPress now. :) It will guide you through the remaining steps.

The Faster Way
WordPress 2.7 is 1.76 MB compressed or 5.38 MB uncompressed, with 603 files. I find it considerably faster to upload only the ZIP file and extract it on the server.
- Estimated time: 10 minutes
- Skill level required: Novice
Requirements
- Access to a web server with FTP, cPanel, and shell access
- An FTP client
Assumptions
- You can follow the steps above
- You're using a Linux server but have no prior Linux experience
Steps
Download WordPress.
Don't unzip it.
Upload the ZIP file.
Open PuTTY or your preferred SSH client.
Connect to your web server.
If you're using HostGator, you can find the IP address in the left sidebar of cPanel under Account Information. The SSH port is
2222.You may need to ask technical support to enable Jailed SSH for your account.
Enter your username and password.
Your password won't appear while you type it. You won't see asterisks or any other characters.
Enter the following commands.
You can press Tab to autocomplete folder and file names. Adjust the names below as needed.
Use
lsto list directory contents andpwdto display your current directory if you get lost. You can also runman <command>for more information about a particular command.cd public_html/<folder-where-you-uploaded-wordpress> unzip wordpress-2.7.zip mv wordpress/* . rm wordpress-2.7.zip rmdir wordpressFollow step 4 onward from the previous section.
That's it for this tutorial. I hope you enjoyed it!