My last tutorial on this subject was written almost three years ago, and it's still the most popular article on this blog. Yet I'm not sure even I could follow it.
Thus, I'm going through the steps again with the latest versions of NetBeans (7.1.2) and Qt (4.8.1), this time taking screenshots along the way.
Download and Installation
NetBeans
The first step is always to get the tools we need. I will be using NetBeans, but there is also a Qt plugin for Visual Studio if that's what you prefer.
I'm also developing on Windows, but the reason you've probably chosen these libraries is because they're cross-platform, so you should be able to follow along on any OS.
Go ahead and download NetBeans if you haven't already.
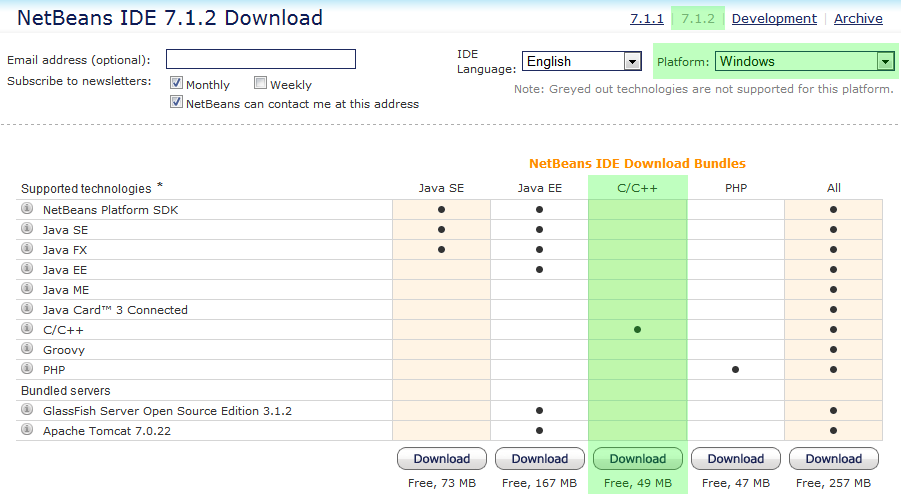
If you're not on Windows, be sure to change the Platform in the top-right corner if it doesn't preselect it for you.
If you fire up NetBeans now and try to create a new project, you're going to get this error message:
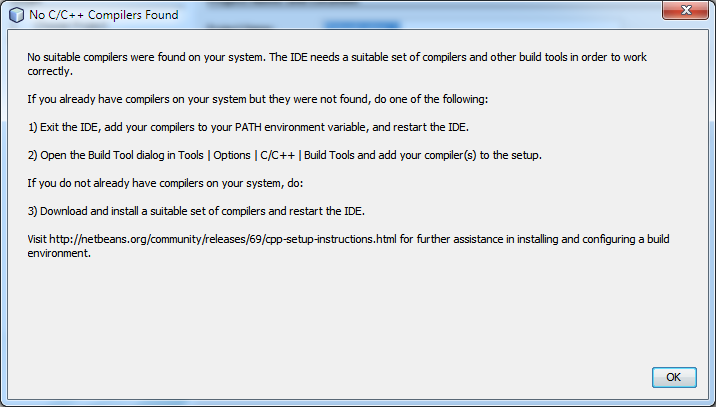
We need a C++ compiler; there isn't one bundled with NetBeans. Qt requires us to use the MinGW compiler. More specifically, we have to use the one that comes bundled with Qt.
I tried installing it separately but couldn't get it to work. Unfortunately, this also means we need to download the full Qt SDK to get everything working correctly, not just the library portion.
Qt SDK
Go to the Qt downloads page and download the installer for your OS.
I chose the offline installer, but I'm sure the online one will work fine too. The Windows version is 1.7 GB, so it may take a while on a slow connection.
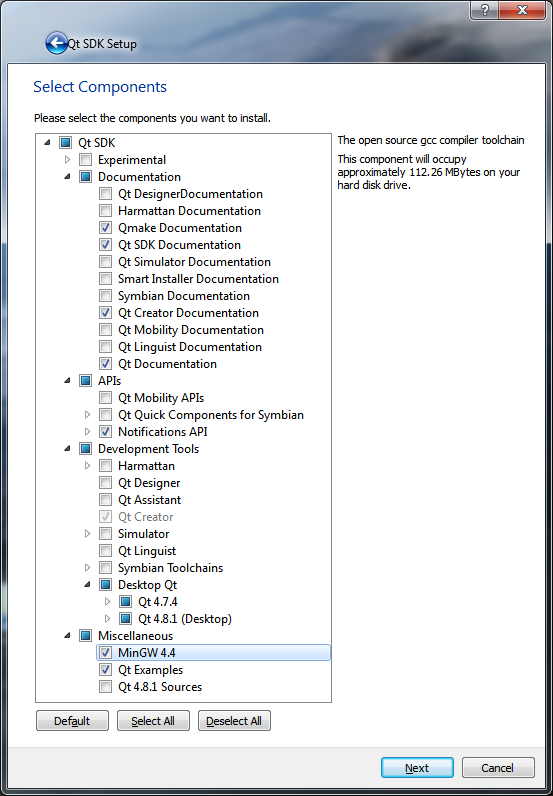
When you get to the Select Components step, make sure you check MinGW 4.4 under the Miscellaneous section. Here are the options I chose:
MSYS Make
MinGW Make apparently doesn't work, according to the NetBeans configuration guide. They recommend MSYS, so we have to install that separately too.
Download the MSYS installer and run it.
It's probably best to leave the defaults. These libraries are picky about paths, particularly spaces in them. Answer the questions it asks:
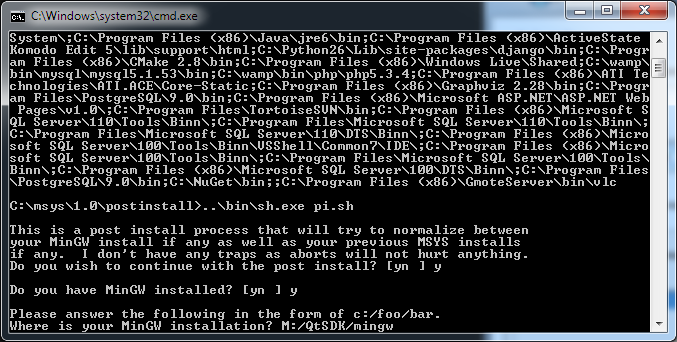
If all went well, you should get a message like this:
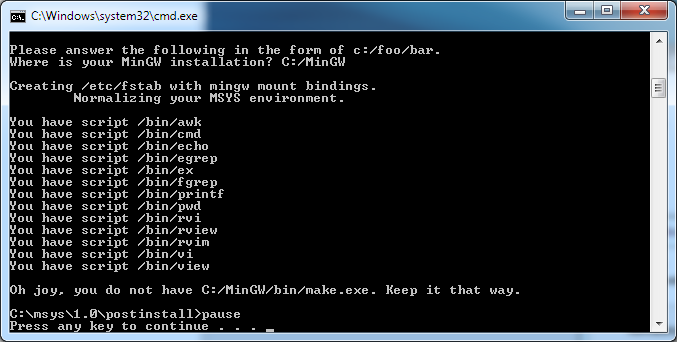
It has a bit of a sense of humor.
Environment Variables
Qt depends on some libraries (.dll files) to run your application. You need to tell Windows where to find these files unless you intend to include them with every compiled application.
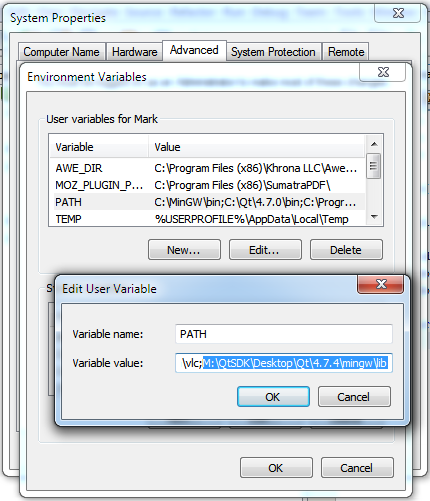
Open your environment variables and edit the PATH variable for your user account.
Add the following directory to the end, or use the corresponding directory wherever you installed Qt:
C:\QtSDK\Desktop\Qt\4.7.4\mingw\libDirectories in PATH are separated by semicolons.
Configuring NetBeans
Now we have to tell NetBeans where to find all these tools.
Open NetBeans and go to Tools → Options. Switch to the C/C++ tab. On the left side, under Tool Collection, click Add....
For the Base Directory, choose the path to the MinGW bin folder.
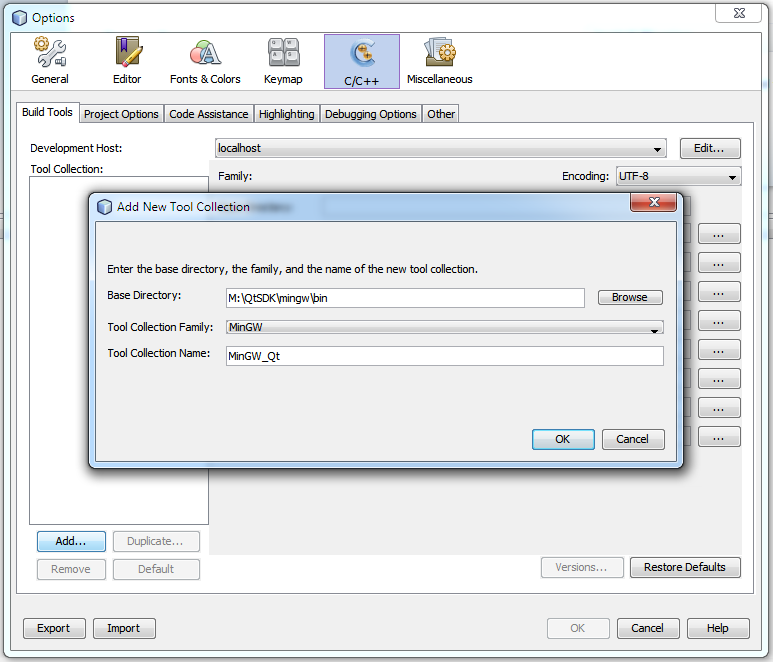
NetBeans should automatically select the Tool Collection Family for you. Name the collection MinGW_Qt and click OK.
It should fill in all the paths for you. If it doesn't, click Restore Defaults.
I don't think mine found QMake, so you may have to fill that one in yourself. It should be in a path similar to:
C:\QtSDK\Desktop\Qt\4.7.4\mingw\bin\qmake.exe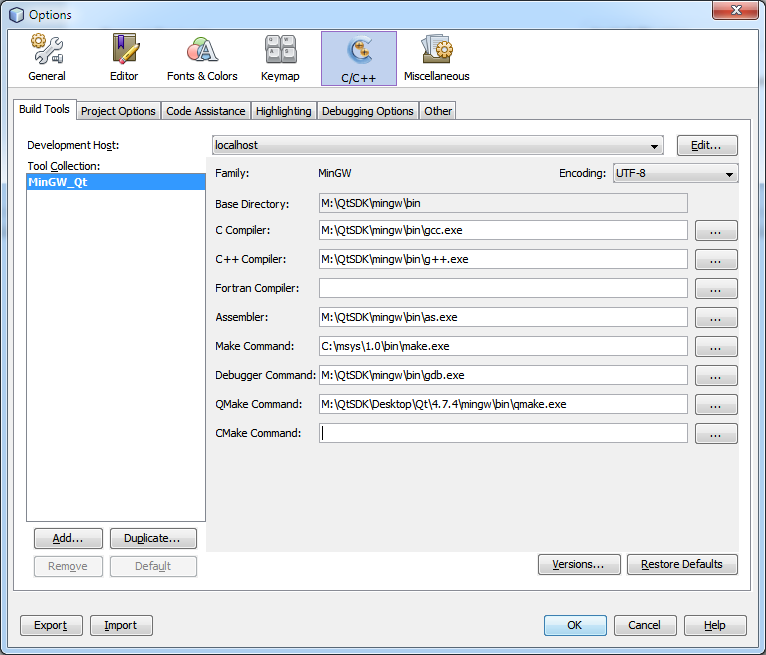
New Project
Once that's all done, we should be ready to start our new project.
Press Ctrl+Shift+N, or click the button on the toolbar.
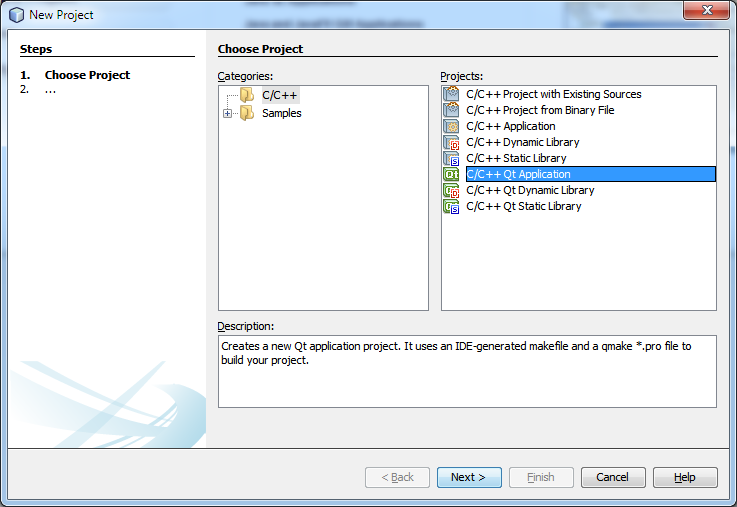
Choose C/C++ Qt Application. It will configure most things for us.
On the next page, make sure you choose the MinGW_Qt tool collection if you have others configured.
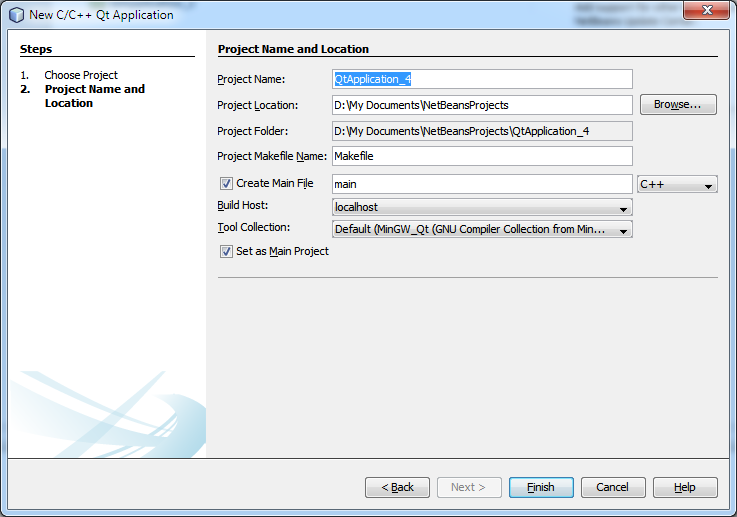
The project should now compile and run, but it won't do anything.
Before we go any further, there's one more thing we have to configure because we want to use OpenGL.
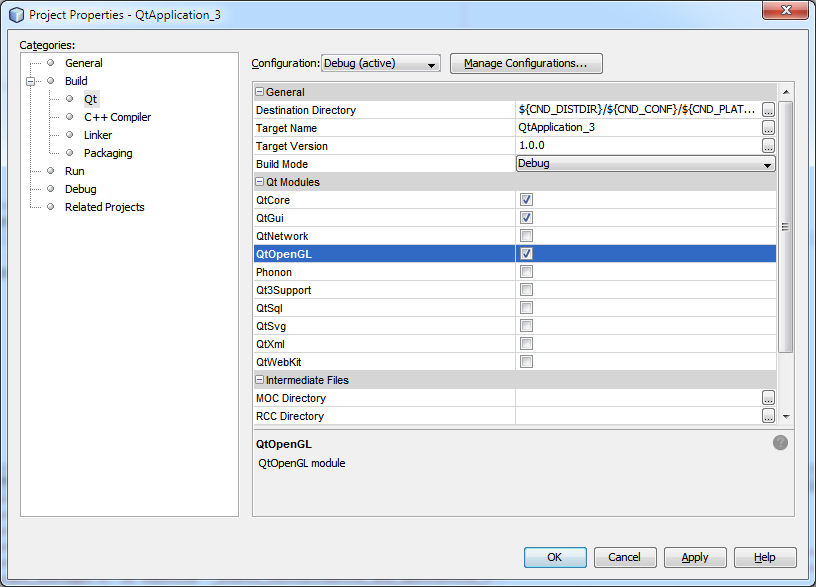
Right-click your project name in the Projects tree on the left and click Properties. Under Build → Qt, check QtOpenGL and click OK.
The Code
Now that our project is set up, we're finally ready to write some code. We'll reuse the example from my last tutorial.
Open main.cpp and replace its contents with the following:
#include <QtGui/QApplication>
#include <QtOpenGL/QGLWidget>
#include "GLWidget.h"

int main(int argc, char *argv[])
{
    QApplication app(argc, argv);

    GLWidget window;
    window.resize(800, 600);
    window.show();

    return app.exec();
}
Right-click your project again and select New → C++ Class.
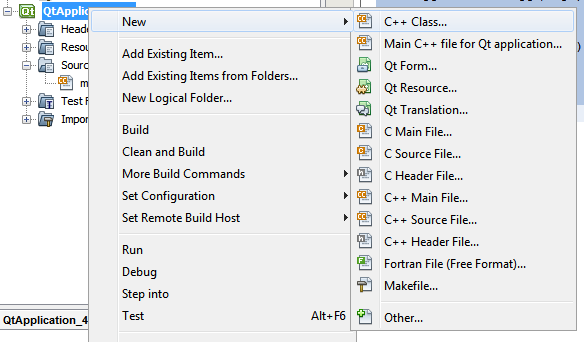
For the class name, enter GLWidget. Everything else is fine.
NetBeans should add two new files to your project:
GLWidget.cppGLWidget.h
It doesn't put these in the header and source file folders automatically for some reason—bad NetBeans—but you can drag them there if you want.
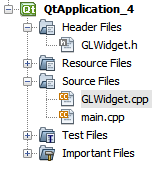
Open GLWidget.cpp and replace its contents with the following:
#include <QtGui/QMouseEvent>
#include "GLWidget.h"
#include "stdio.h"

GLWidget::GLWidget(QWidget *parent)
    : QGLWidget(parent)
{
    setMouseTracking(true);
}

void GLWidget::initializeGL()
{
    glDisable(GL_TEXTURE_2D);
    glDisable(GL_DEPTH_TEST);
    glDisable(GL_COLOR_MATERIAL);
    glEnable(GL_BLEND);
    glEnable(GL_POLYGON_SMOOTH);
    glBlendFunc(GL_SRC_ALPHA, GL_ONE_MINUS_SRC_ALPHA);
    glClearColor(0, 0, 0, 0);
}

void GLWidget::resizeGL(int w, int h)
{
    glViewport(0, 0, w, h);
    glMatrixMode(GL_PROJECTION);
    glLoadIdentity();
    gluOrtho2D(0, w, 0, h); // Set origin to bottom-left corner.
    glMatrixMode(GL_MODELVIEW);
    glLoadIdentity();
}

void GLWidget::paintGL()
{
    glClear(GL_COLOR_BUFFER_BIT);
    glColor3f(1, 0, 0);

    glBegin(GL_POLYGON);
    glVertex2f(0, 0);
    glVertex2f(100, 500);
    glVertex2f(500, 100);
    glEnd();
}

void GLWidget::mousePressEvent(QMouseEvent *event)
{
}

void GLWidget::mouseMoveEvent(QMouseEvent *event)
{
    printf("%d, %d\n", event->x(), event->y());
}

void GLWidget::keyPressEvent(QKeyEvent *event)
{
    switch (event->key()) {
    case Qt::Key_Escape:
        close();
        break;

    default:
        event->ignore();
        break;
    }
}
Open GLWidget.h and replace its contents with the following:
#ifndef _GLWIDGET_H
#define _GLWIDGET_H

#include <QtOpenGL/QGLWidget>

class GLWidget : public QGLWidget
{
    Q_OBJECT // Must include this if you use Qt signals or slots.

public:
    GLWidget(QWidget *parent = NULL);

protected:
    void initializeGL();
    void resizeGL(int w, int h);
    void paintGL();
    void mousePressEvent(QMouseEvent *event);
    void mouseMoveEvent(QMouseEvent *event);
    void keyPressEvent(QKeyEvent *event);
};

#endif /* _GLWIDGET_H */
Compile and run the project. If you're lucky, you'll get something that looks like this:
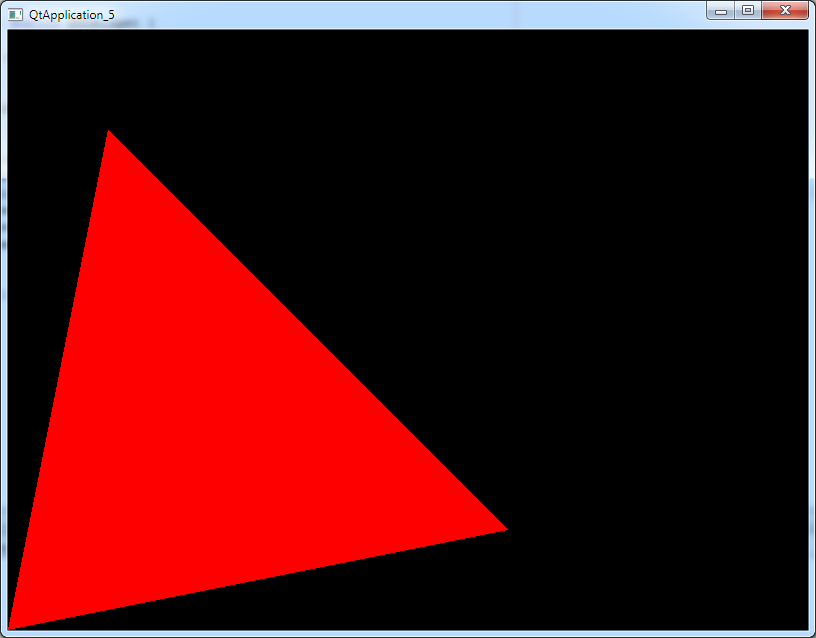
That's it! Happy coding.